Golf Grip, Stance and Posture: The Fundamentals
The setup fundamentals before you swing: overlap, interlock and ten-finger grips, grip pressure, ball position, stance width, posture and alignment.
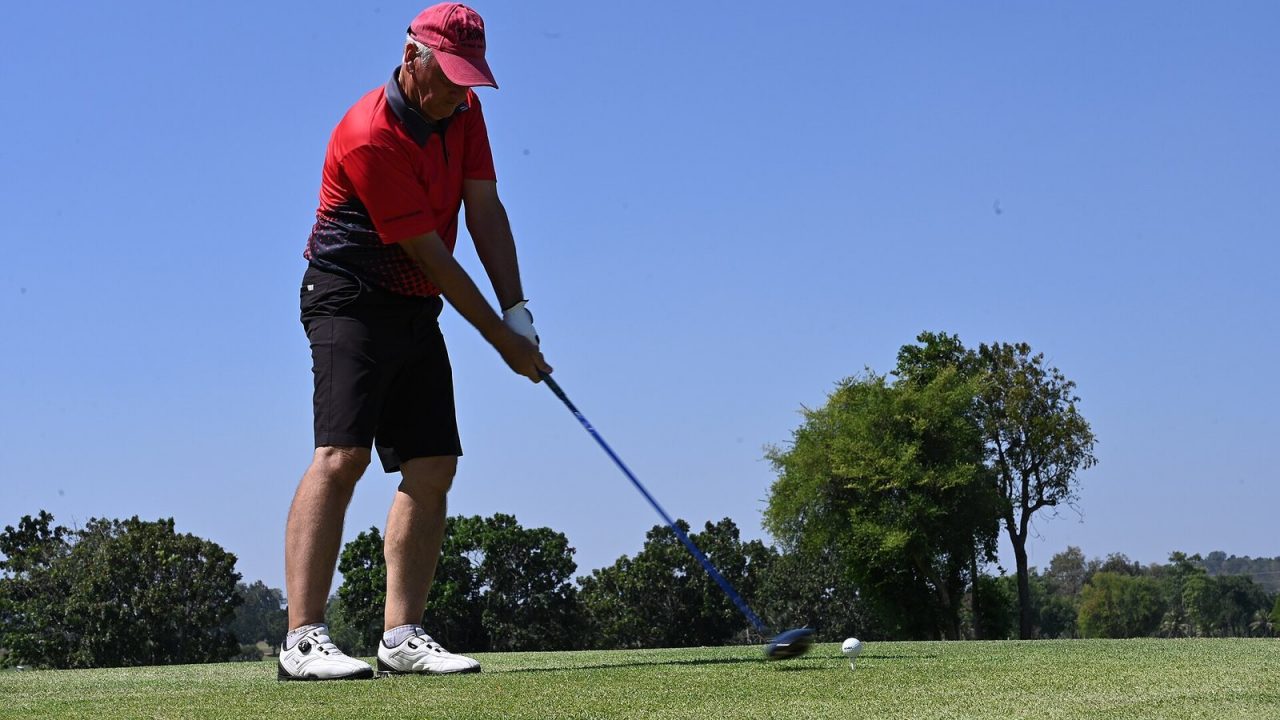
Most swing problems begin before the club moves. Coaches at every level spend a large share of their lessons on the setup: how you hold the club, where you stand, how you tilt your body and where you aim. These are the parts of golf you can control completely, because nothing is moving yet. Get them right and the swing has a fair chance; get them wrong and you will spend the round compensating.
This guide covers the widely taught fundamentals for a right-handed golfer (left-handers simply reverse the directions). It describes common coaching principles rather than a single “correct” method, and every body is different. A lesson with a qualified golf professional is the best way to adapt these basics to your own build and swing.
The grip: your only connection to the club
Your hands are the only part of you that touches the club, so the grip has a direct influence on where the clubface points at impact. In golf terms, the lead hand is the hand nearer the target (the left for a right-hander) and the trail hand is the other one.
Placing the lead hand
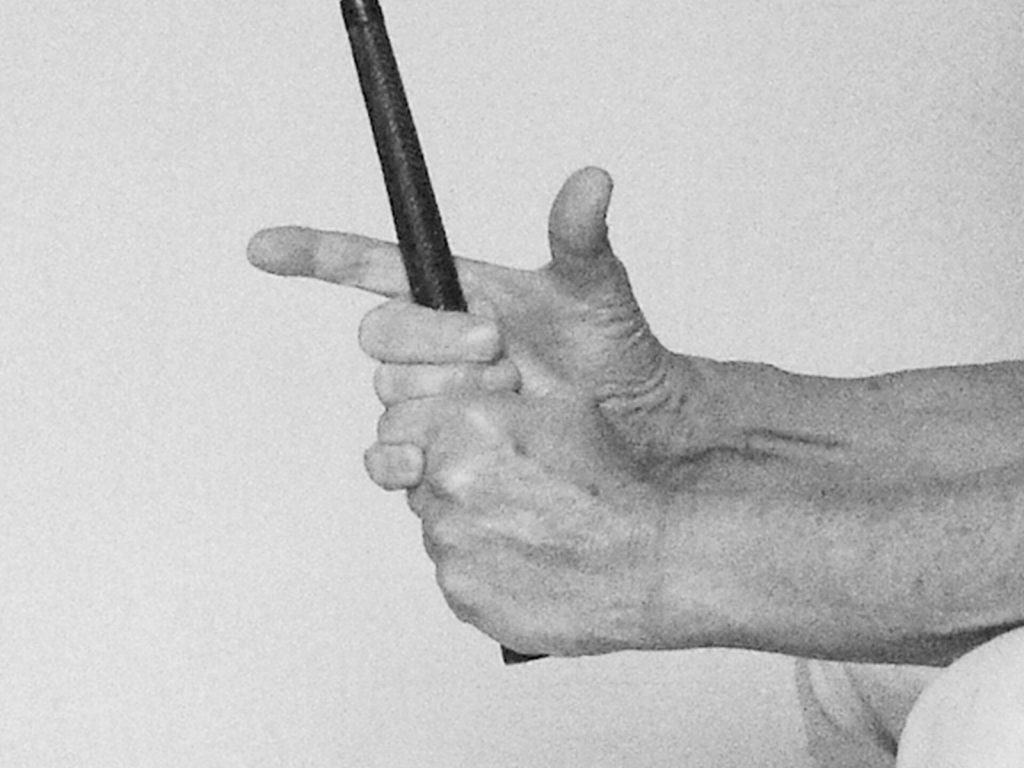
- Let the lead arm hang naturally and place the grip so that it runs diagonally across the fingers, from roughly the base of the little finger to the middle of the index finger, rather than across the palm.
- Close the hand so the heel pad sits on top of the grip and the thumb rests just to the trail side of center.
- Looking down, many coaches like to see two or three knuckles of the lead hand. Fewer knuckles is often called a “weak” grip, more a “strong” grip. These words describe rotation, not pressure.
Placing the trail hand
- The trail hand also holds the club mainly in the fingers.
- Its palm covers the lead thumb, which fits along the trail hand’s lifeline.
- The palms should roughly face each other so the hands work as a unit.
Three grip styles: overlap, interlock and ten-finger
The main difference between the three common grips is what happens with the little finger of the trail hand.
| Grip | How it works | Often suits |
|---|---|---|
| Overlapping (Vardon) | The trail little finger rests on top of the gap between the lead hand’s index and middle fingers. | Players with average or larger hands; the most traditional grip among professionals. |
| Interlocking | The trail little finger hooks between the lead index and middle fingers, linking the hands. | Players with smaller hands or who like the hands firmly connected. |
| Ten-finger (baseball) | All ten fingers are on the grip, with the trail little finger snug against the lead index finger. | Beginners, juniors, players with less hand strength or arthritis. |
The overlapping grip is named after Harry Vardon, the six-time Open champion who popularized it. None of the three is “correct.” Many great players have used the interlocking grip, and some have used the ten-finger grip successfully. Choose the one that feels secure and lets your hands work together.
Grip pressure
One of the most common faults is gripping too tightly. Tension in the hands spreads to the forearms and shoulders and restricts a free swing. Coaches often describe ideal pressure as firm enough to control the club but light enough that the forearms stay relaxed, sometimes using a scale of one to ten and suggesting a middle value. Pressure should be fairly consistent from the start of the swing to the finish rather than tightening suddenly at the top.
Posture: building an athletic base
Good posture lets you turn around your spine and swing the arms freely. The widely taught sequence is:
- Stand tall with the club held out in front of you.
- Hinge forward from the hips, not the waist, pushing the hips slightly back, until the club touches the ground. Keep the back relatively straight rather than slumped.
- Flex the knees slightly, enough to feel athletic and balanced, not squatting.
- Let the arms hang naturally from the shoulders. If they hang straight down, the distance from your body to the ball is usually about right.
- Balance your weight toward the balls of the feet, neither on the toes nor on the heels.
Spine tilt
For a right-hander, the trail hand sits lower on the grip than the lead hand, so the trail shoulder naturally sits a little lower than the lead shoulder at address. That slight tilt of the upper body away from the target is generally more noticeable with longer clubs, where the ball is farther forward. Too much tilt can lead to hitting up too steeply or hitting behind the ball; none at all can make it harder to deliver the club well.
Common posture faults
- Slouching with a rounded back, which restricts the turn.
- Standing too upright, which tends to make the swing flatter and less consistent.
- Too much knee flex, which drops the body into a sitting position.
- Reaching for the ball so the weight moves onto the toes.
Stance width and ball position
Stance width
For a mid iron, a common guideline is feet about shoulder-width apart, measured from the insides of the heels to roughly the outsides of the shoulders. From there:
- Driver and fairway woods: a slightly wider stance for stability in a bigger swing.
- Short irons and wedges: slightly narrower, for control.
- Short chips and pitches: narrower still.
Ball position by club
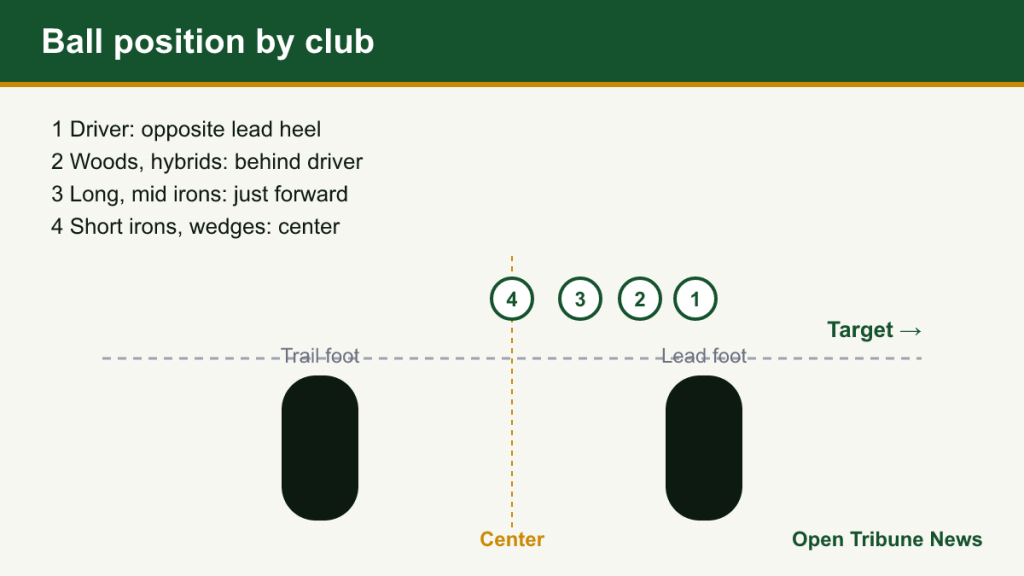
Ball position changes with the club because the bottom of the swing arc and the desired strike change. A widely taught pattern for full shots:
| Club | Typical ball position |
|---|---|
| Driver | Forward, roughly opposite the lead heel, so the ball is struck slightly on the upswing from a tee. |
| Fairway woods and hybrids | A little behind the driver position. |
| Long and mid irons | Slightly forward of center. |
| Short irons and wedges | Around the center of the stance. |
Weight distribution often follows a similar pattern: a slightly greater share on the lead foot for short irons and a more even balance for long clubs. These are starting points; your coach may adjust them for your swing.
Alignment: aiming the club and the body
Alignment is the most overlooked fundamental. Golfers often aim well right or left of the target without realizing it, then make swing changes to compensate.
The two lines
Picture railway tracks. The ball and clubface sit on the outer rail, aimed at the target. Your feet, knees, hips and shoulders sit on the inner rail, parallel to that line, not pointed at the target. For a right-hander, that means the body lines point slightly left of the target itself.
A simple aiming routine
- Stand behind the ball and pick your target.
- Choose an intermediate marker, such as a leaf or a mark in the grass, a short distance ahead of the ball on your target line.
- Set the clubface square to that intermediate marker first.
- Then set your feet and body parallel to the clubface line.
When practicing, two clubs on the ground (one along the target line, one along the toe line) are a simple, effective check. One rules point to remember: under the Rules of Golf you must not set an object down to help you with your stance during a round, so alignment aids belong on the range, not on the course.
A pre-shot routine that ties it together
Good players build these fundamentals into a consistent routine so they happen automatically:
- Assess the shot and choose the club.
- Stand behind the ball and pick a target and an intermediate marker.
- Take your grip before setting the club down.
- Set the clubface to the marker, then build your stance and posture.
- Take a final look at the target, release any tension, and swing.
Keep the routine brief. The Rules of Golf recommend making a stroke in no more than 40 seconds once it is your turn, and usually quicker, and a short routine helps your playing partners as much as your swing. Our beginner’s guide to a round of golf has more on pace of play.
How setup affects ball flight
Setup errors leave fingerprints on your shots, which makes them a useful diagnostic. For a right-hander, a ball that starts left and curves further left often points to a clubface closed to the swing path; one that curves sharply right (a slice) usually means the face is open relative to the path, often with an outside-in swing. Grip, alignment and ball position all feed into those face and path relationships. A grip rotated too far toward a “weak” position, shoulders aimed left, or the ball too far forward are common contributors to a slice. A qualified coach can match your shot pattern to its likely setup causes far faster than trial and error.
Practicing the fundamentals
- Use a mirror at home. Check your posture and grip without hitting a ball.
- Practice with alignment clubs on the range every session.
- Hold a club in your grip while watching television to get used to a new hold.
- Film your setup from face-on and down-the-line angles and compare it with your coach’s guidance.
- Check one thing at a time. Trying to fix grip, posture and alignment all at once is overwhelming.
Changing a grip or setup often feels strange at first, and results can get worse before they get better. That is normal. A qualified coach can tell you which adjustments matter most for your swing. If you have any injuries or physical limitations, consult a medical professional and let your coach know, because setup positions can be adapted.
The right equipment helps too: clubs of the correct length and grip size make a good setup easier to achieve. Our guide to golf clubs explained covers what each club is designed to do.